

.jpg)


.jpg)


Schluter-REMA Magnetic Access Panel System Pack of 4
Schluter-REMA Magnetic Access Panel System
Contents:
- 4 Magnets
- 4 Counter Plates
Application and Function:
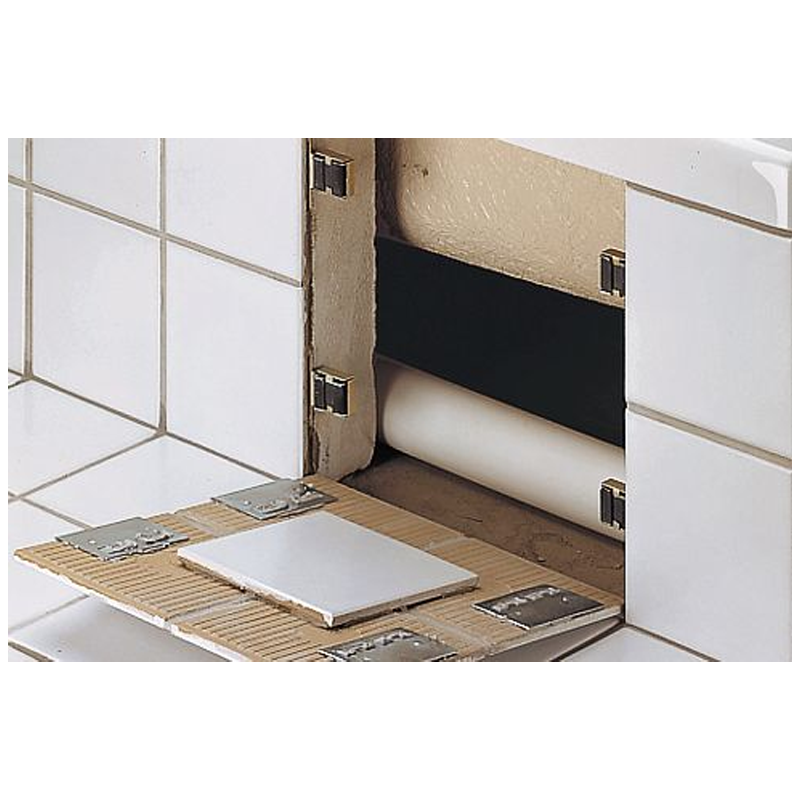
Schlüter®-REMA is the ideal system for creating concealed access panels in tiled wall coverings.
Schlüter®-REMA’s installation is independent of tile size and thickness and enables exact matching of the access panel to the overall joint design. Thus, panels that access electrical or plumbing components, for example, do not spoil the visual appearance of the tiles.
Material:
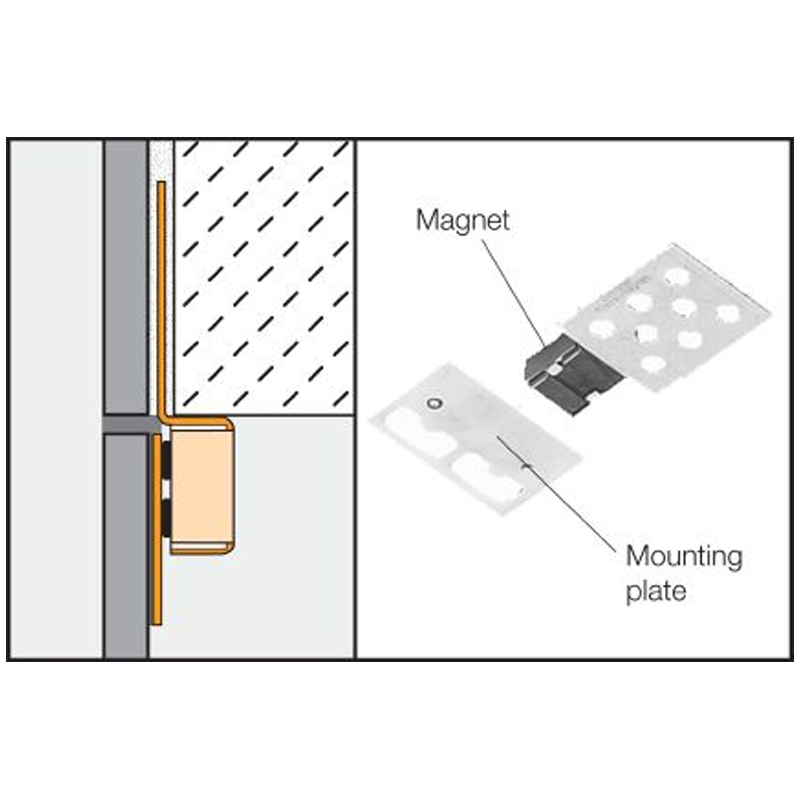
Schlüter®-REMA assembly kit consists of four aluminium brackets with moulded casings containing magnets clamped to lateral, moveable guide shoes, and four ferromagnetic metal counter plates.
Material properties and areas of application:
Schlüter®-REMA is suited for creating concealed access panels in wall coverings. If the access opening is substantially larger than 30 cm x 30 cm, it may be necessary to install two additional magnets. In special cases, the suitability of Schlüter®-REMA must be verified, based on anticipated chemical, mechanical, and/or other stresses.
Contents:
- 4 Magnets
- 4 Counter Plates
Installation:
1. Adhere an aluminium bracket to the back of each perimeter tile with tile adhesive so that the magnet extends beyond the tile’s edge.
2. Set tiles with the magnets attached as perimeter limits, so that four magnets extend into the access opening.
3. To form the access panel cover, connect the corresponding number of tiles by attaching a tile to their backs with tile adhesive.
4. Using silicone, adhere the counter plates to the back of the panel cover in alignment with the perimeter magnets.
5. After the silicone has cured, install the cover and seal the surrounding joint with a colour co-ordinated sealing compound.

